Navigating Network Resources with Ease: A Comprehensive Guide to Windows Network Drive Mapping
Related Articles: Navigating Network Resources with Ease: A Comprehensive Guide to Windows Network Drive Mapping
Introduction
With enthusiasm, let’s navigate through the intriguing topic related to Navigating Network Resources with Ease: A Comprehensive Guide to Windows Network Drive Mapping. Let’s weave interesting information and offer fresh perspectives to the readers.
Table of Content
Navigating Network Resources with Ease: A Comprehensive Guide to Windows Network Drive Mapping

In the realm of modern computing, seamless access to shared resources is paramount. Whether collaborating on projects, accessing files on a remote server, or simply managing data across multiple devices, the need to navigate and interact with network resources efficiently is undeniable. This is where the concept of network drive mapping in Windows comes into play, offering a user-friendly and streamlined approach to managing shared locations.
Understanding the Fundamentals of Network Drive Mapping
At its core, network drive mapping is a mechanism that allows users to assign a virtual drive letter within their Windows environment to a specific shared network location. This virtual drive letter functions as a direct link to the designated network folder, providing access to its contents as if it were a local drive.
Benefits of Network Drive Mapping
The advantages of employing network drive mapping are manifold:
- Simplified Access: Instead of navigating through complex network paths, users can access shared resources through a familiar drive letter, making it easier to locate and manage files.
- Enhanced Organization: Mapping network drives allows users to organize shared resources logically, creating a more streamlined and intuitive file management structure.
- Improved Efficiency: By providing direct access to shared locations, network drive mapping eliminates the need for repeated browsing through network folders, saving time and effort.
- Centralized Data Management: Mapping network drives facilitates centralized data management, enabling users to access and modify files from different locations within the network.
- Streamlined Collaboration: Shared resources accessed through mapped drives become easily accessible to authorized users, fostering seamless collaboration and project management.
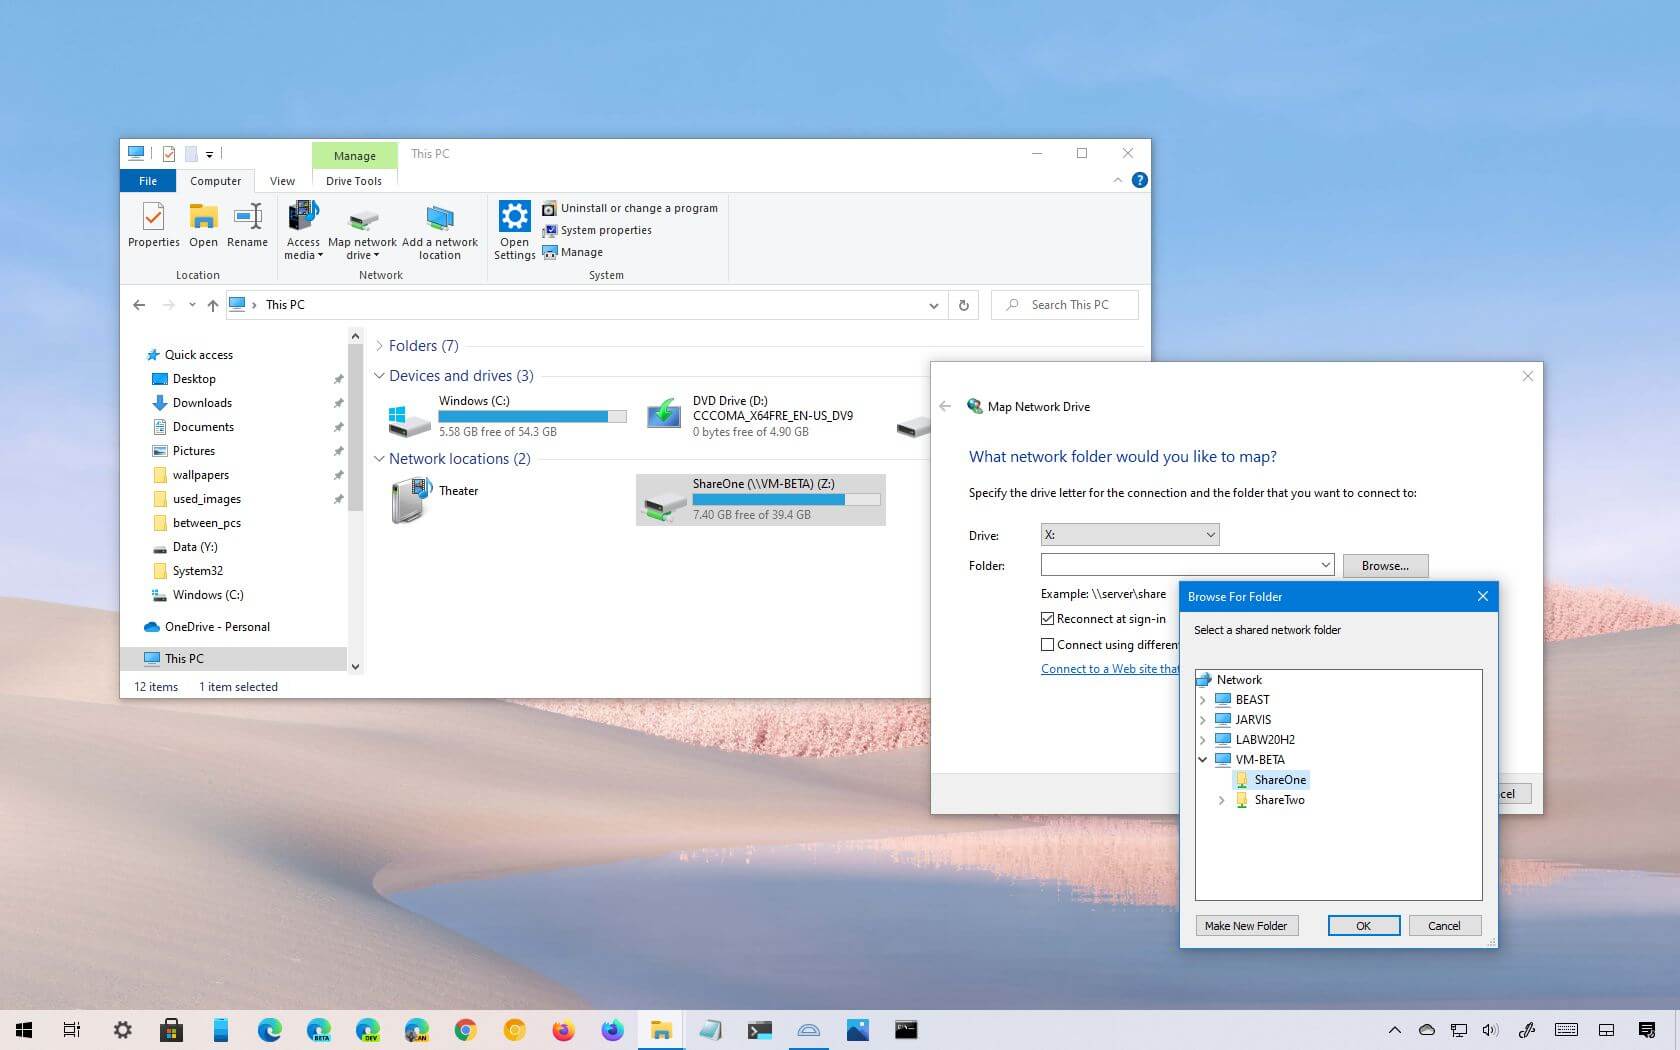
Mapping a Network Drive: A Step-by-Step Guide
Mapping a network drive in Windows is a straightforward process, achievable through the following steps:
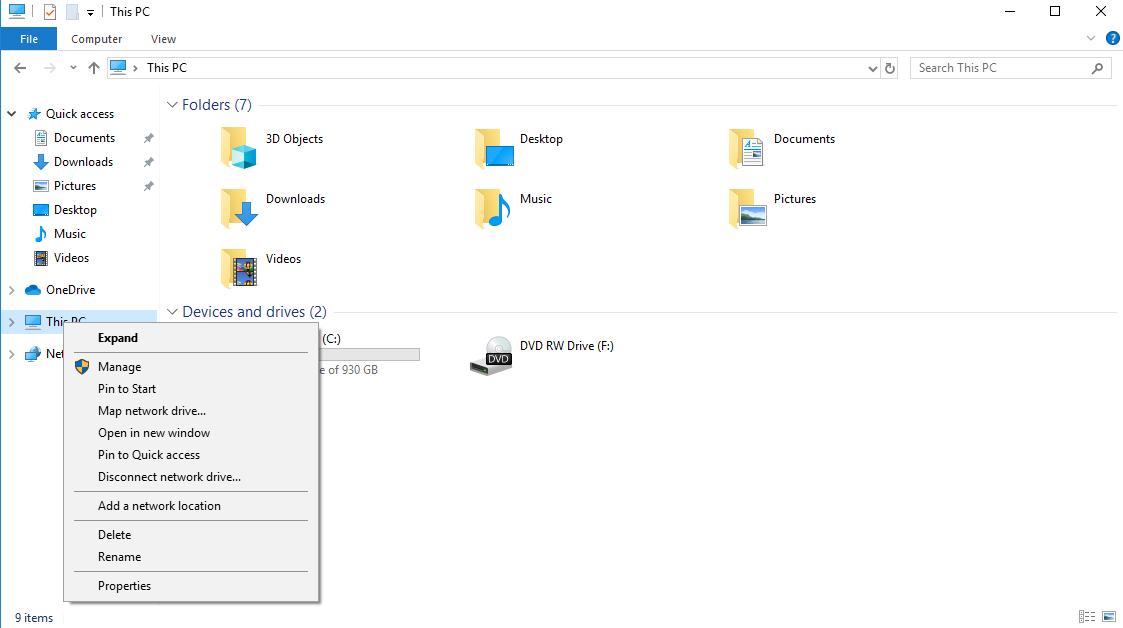
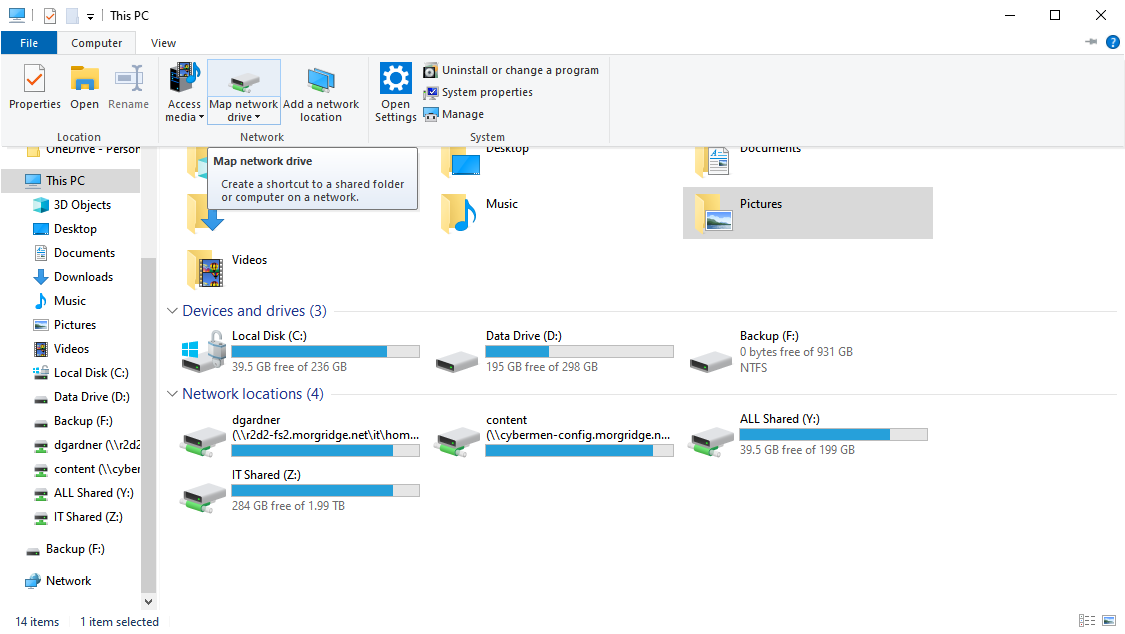
- Open "This PC" or "My Computer": Navigate to the "This PC" or "My Computer" window, which can be accessed through the File Explorer or by searching for it in the Start menu.
- Locate the "Map Network Drive" option: Within the "This PC" or "My Computer" window, look for the "Map Network Drive" option, typically found under the "Computer" tab or in the "Network" section.
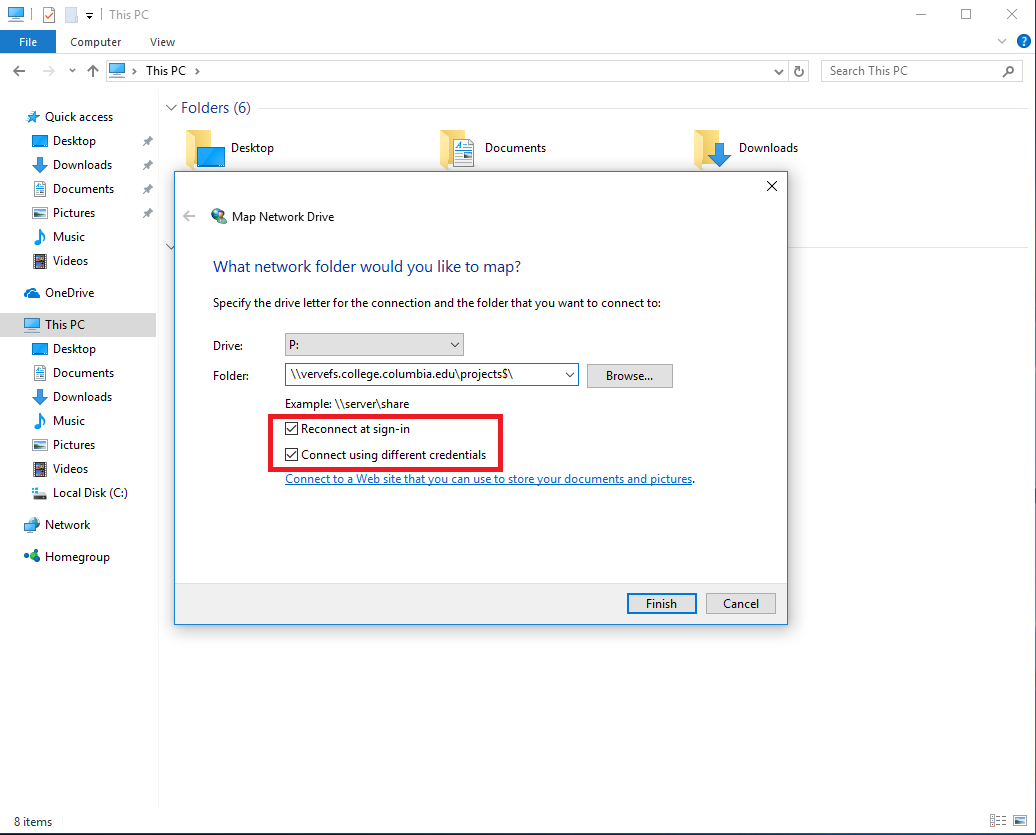
- Specify the drive letter and network path: In the "Map Network Drive" window, select a desired drive letter (e.g., Z, Y) and enter the network path to the shared location. This path typically follows the format "server_nameshare_name".
- Configure connection options (optional): You can choose to connect to the network drive every time you log in, or require a password prompt for each connection.
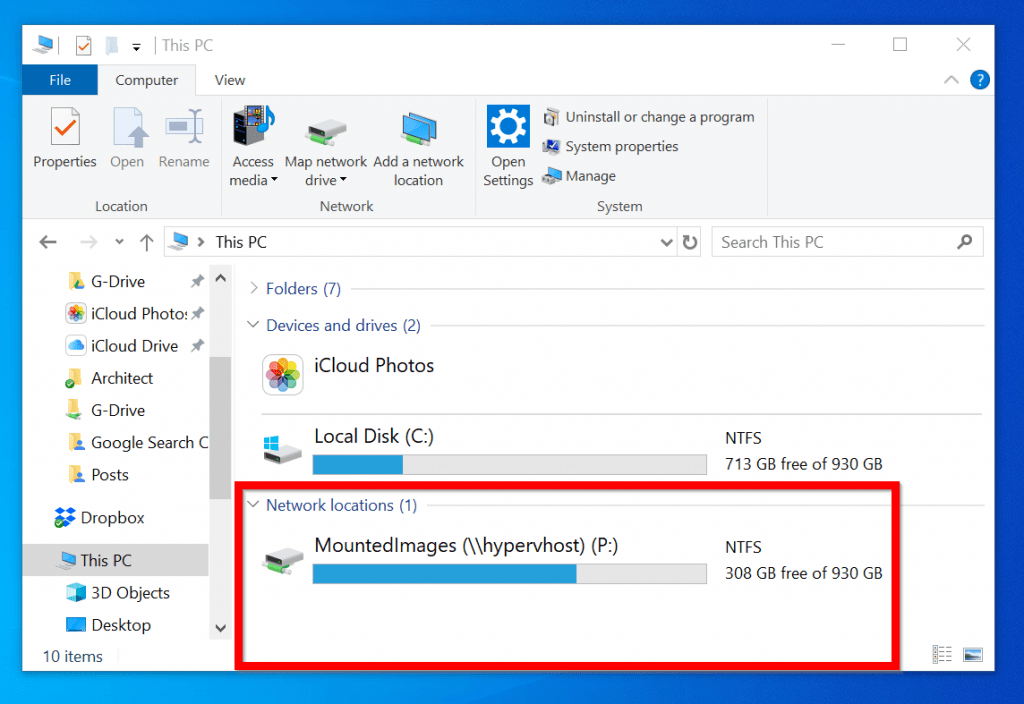
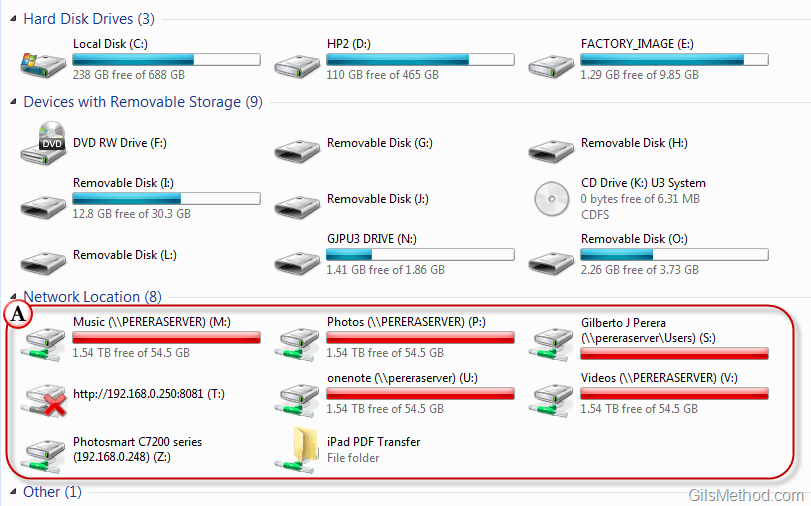
- Complete the mapping process: Click "Finish" to complete the mapping process. The mapped network drive will now appear in "This PC" or "My Computer," granting you access to its contents.
Unmapping a Network Drive
To remove a mapped network drive, follow these steps:
- Open "This PC" or "My Computer": Navigate to the "This PC" or "My Computer" window.
- Locate the mapped drive: Identify the mapped drive in the "This PC" or "My Computer" window.
- Right-click the mapped drive: Right-click the mapped drive and select "Disconnect" from the context menu.
- Confirm disconnection: Confirm the disconnection by clicking "Yes" in the confirmation prompt. The mapped drive will be removed from the "This PC" or "My Computer" window.
Troubleshooting Network Drive Mapping Issues
While network drive mapping is generally straightforward, certain issues may arise:
- Access denied: This error typically indicates insufficient permissions to access the shared network location. Contact the network administrator or the owner of the shared folder to request access.
- Network connection issues: Ensure a stable network connection is established before attempting to map a network drive. Check your network settings and troubleshoot any connectivity problems.
- Incorrect network path: Double-check the accuracy of the network path entered during the mapping process. Ensure the server name and share name are correctly spelled and the path is valid.
- Drive letter conflict: If the desired drive letter is already assigned to a local drive, choose a different letter for the mapped network drive.
Frequently Asked Questions (FAQs) about Network Drive Mapping
Q: Can I map a network drive to a specific folder within a shared location?
A: Yes, you can map a network drive to a specific folder within a shared location by including the folder’s name in the network path. For example, "server_nameshare_namefolder_name".
Q: Can I map a network drive to a folder on a local drive?
A: No, you cannot map a network drive to a folder on a local drive. Network drive mapping is specifically designed for connecting to shared network resources.
Q: What happens to my mapped network drives when I log out of my Windows account?
A: By default, mapped network drives are disconnected when you log out of your Windows account. However, you can configure the connection options to reconnect automatically upon logging in.
Q: Can I access mapped network drives from other devices on the same network?
A: Network drive mappings are specific to the device and user account on which they were created. Accessing mapped drives from other devices requires mapping them individually on those devices.
Q: How do I secure my mapped network drives?
A: It’s recommended to utilize strong passwords for accessing shared network resources. Additionally, configure appropriate permissions on the shared folders to restrict access to authorized users only.
Tips for Effective Network Drive Mapping
- Use descriptive drive letters: Assign drive letters that clearly indicate the purpose or location of the mapped network drive (e.g., "S" for "Server Data", "P" for "Project Files").
- Consider using a consistent naming convention: Establish a standard naming convention for network drives across your organization to maintain uniformity and facilitate easier identification.
- Regularly review and update mapped drives: Ensure that mapped drives remain relevant and necessary. Remove outdated or unused mappings to streamline your file management system.
- Utilize proper security measures: Implement strong passwords and appropriate permissions to protect sensitive data stored on shared network locations.
Conclusion
Network drive mapping in Windows provides a user-friendly and efficient way to manage shared network resources. By leveraging the benefits of simplified access, enhanced organization, and improved efficiency, network drive mapping empowers users to navigate and interact with shared locations seamlessly. Understanding the fundamentals of network drive mapping, its advantages, and troubleshooting techniques allows users to optimize their file management practices and enhance collaboration within their network environment.


Closure
Thus, we hope this article has provided valuable insights into Navigating Network Resources with Ease: A Comprehensive Guide to Windows Network Drive Mapping. We appreciate your attention to our article. See you in our next article!